Christine de Beer - effortless floral craftsman
Paper flowers
- 28 February 2011
- and more
A new video to update: coffee filter blossoms.
Almost any type of paper can be used to make flowers.
Thicker paper makes great Tutorial: Spiral Blossoms .
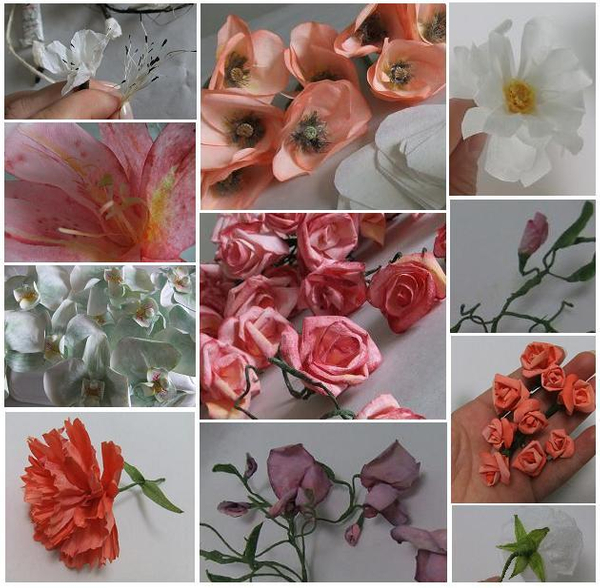
Below you will find instructions for:
Roses, kalanchoe, sweet peas, carnations, blossoms, lilies, poppies, daisies, chrysanthemums and orchids.
The flowers in these tutorials can be made from tissue paper, Crêpe paper (tissue paper crinkled and sprayed with an adhesive), thin cardboard, newsprint (even printed newspaper) sheet music and coffee filters (which is basically Crêpe paper made from long wood fibres from fast growing trees)
Design note:
Recycle used coffee filters:
New coffee filters create a pure white flower. But I like to find a use (re-use) for my coffee filters. The natural stain that you get from rinsing out the coffee from the filters gives the flowers a sun bronzed, antiqued look. The slight coffee stains look especially great when making the roses, lilies or orchids.
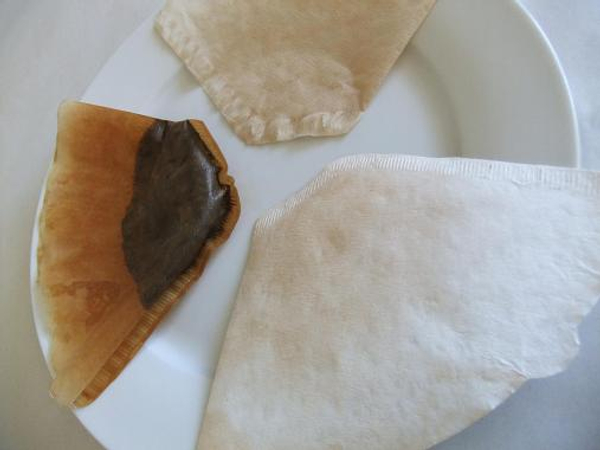
Wash, rinse and iron the used coffee filters.
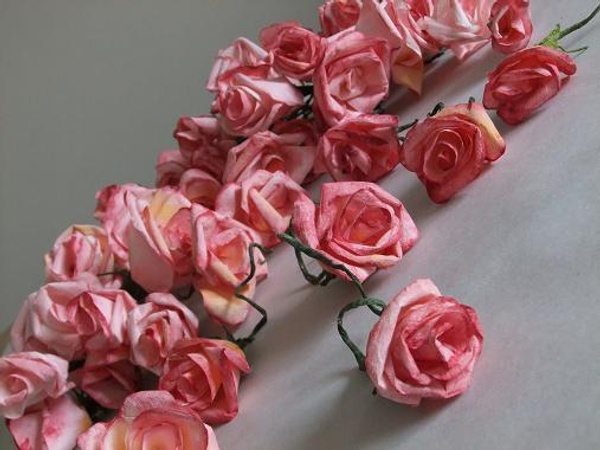
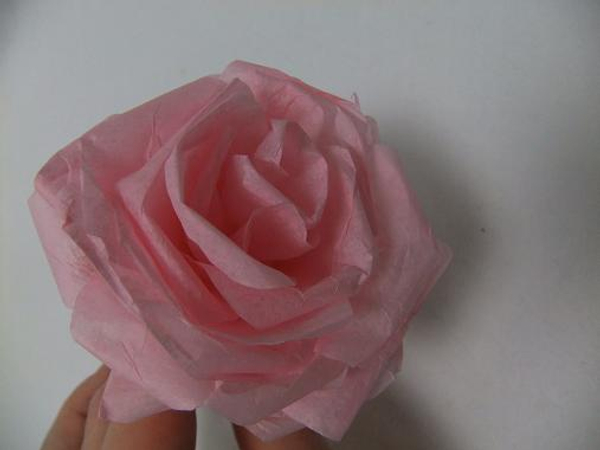
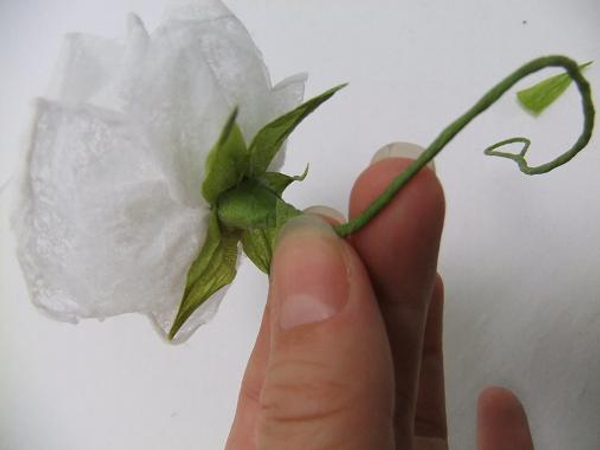
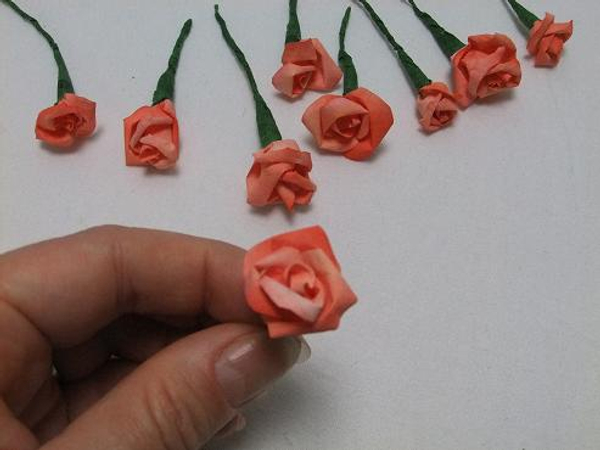
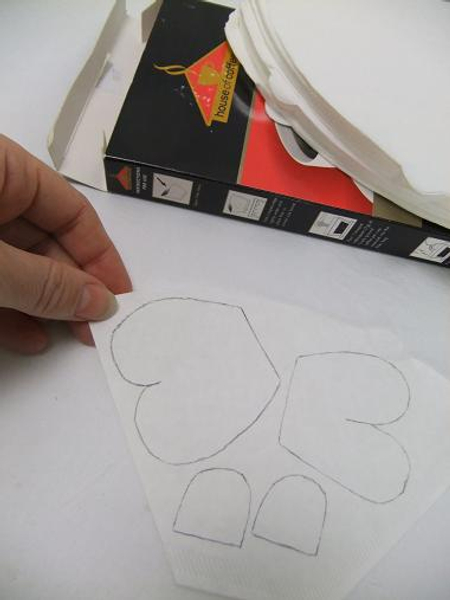
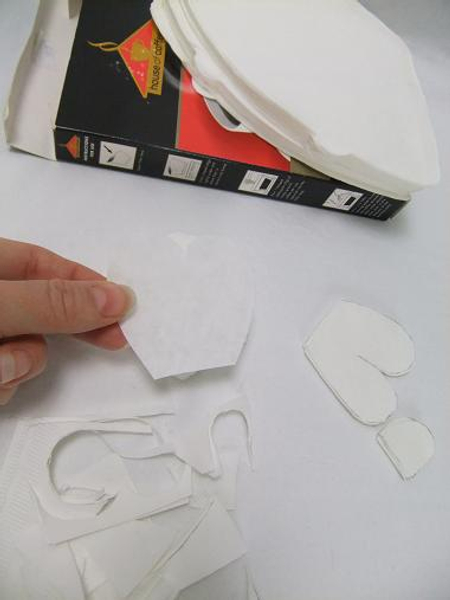
Roses:
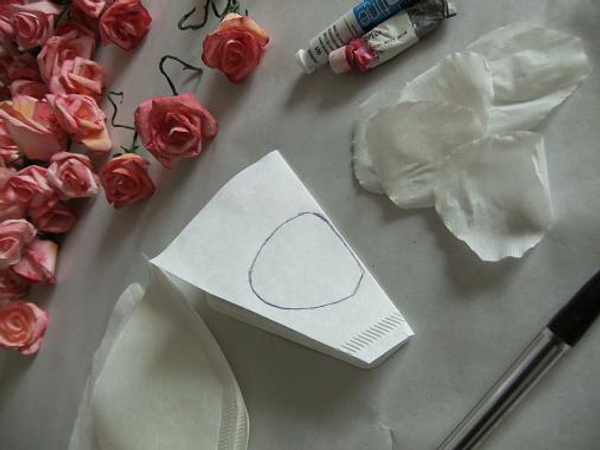
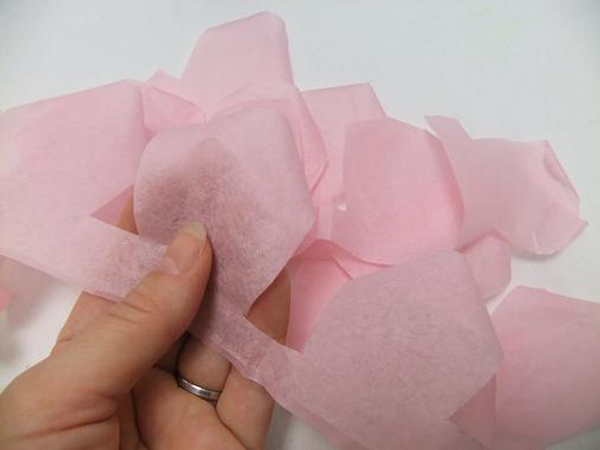
Cut the petal shape. You will need 8 coffee filters for each full bloom rose.
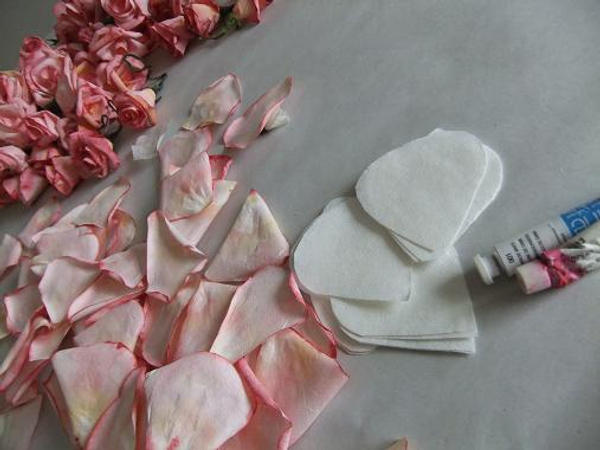
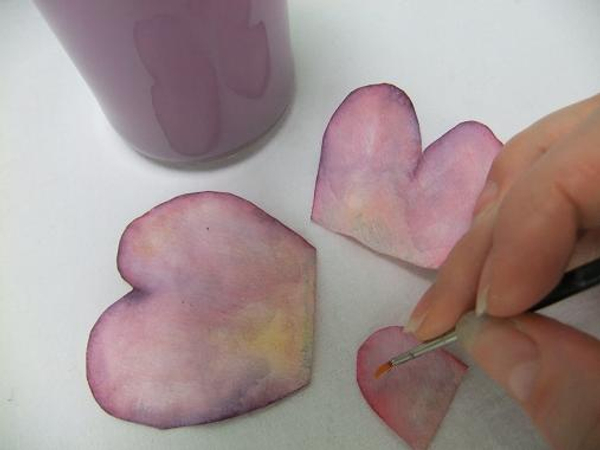
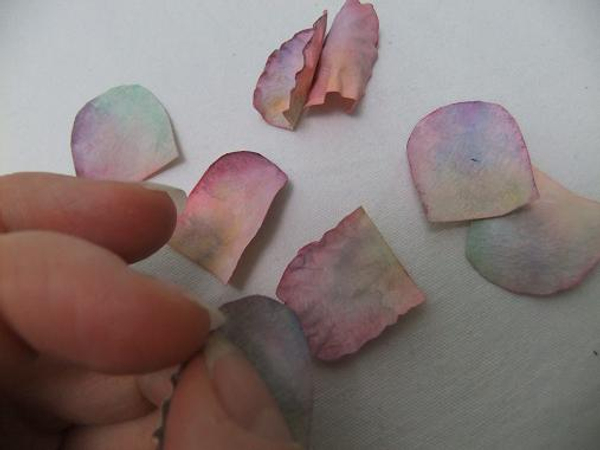
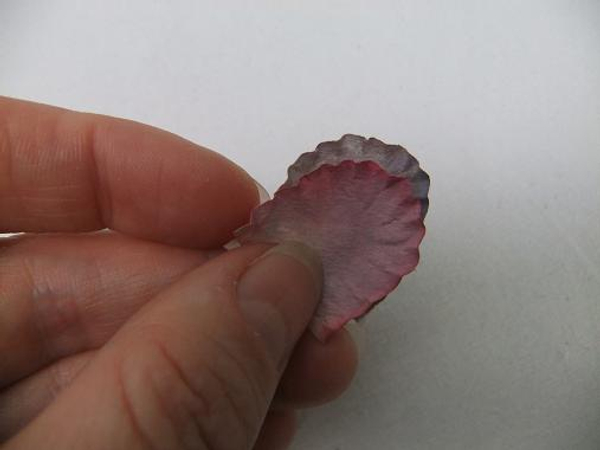
Paint the entire petal white and then blend in whatever colour you prefer with good quality water colour paint. Set aside to dry. The water colour paint alters the texture of the paper- similar to wax making it easy to shape.
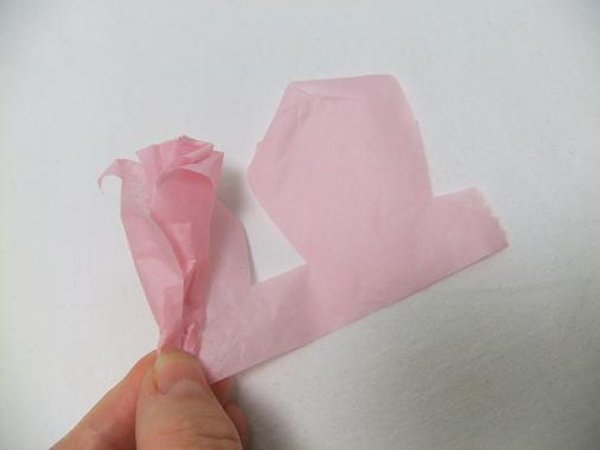
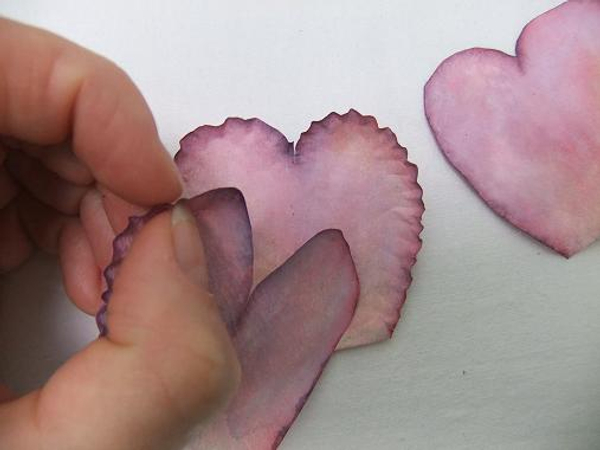
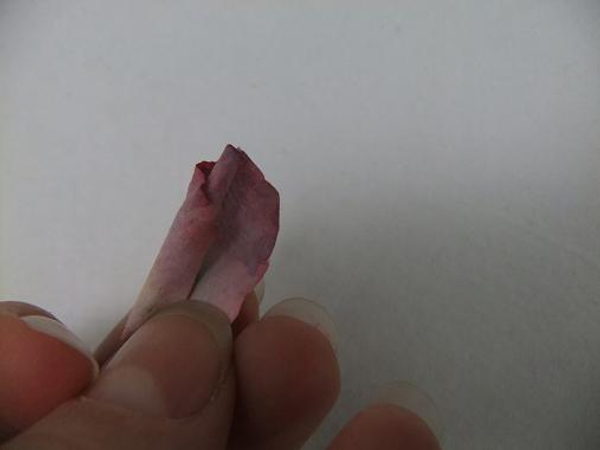
Curl the top of the petal over and scratch the bottom end of the petal with your nail to curve.
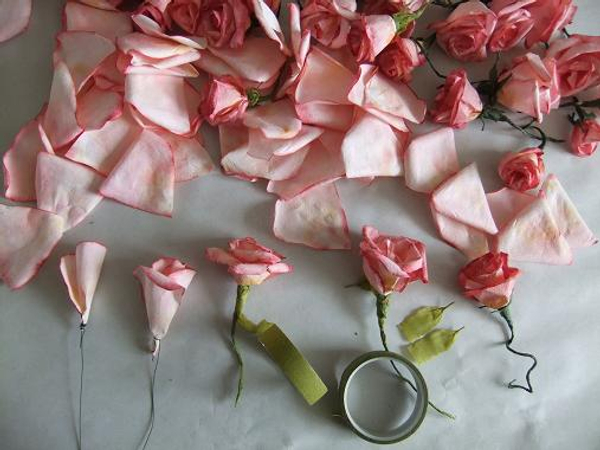
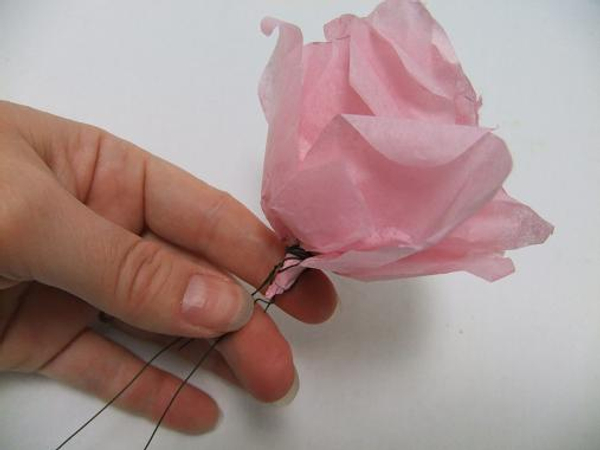
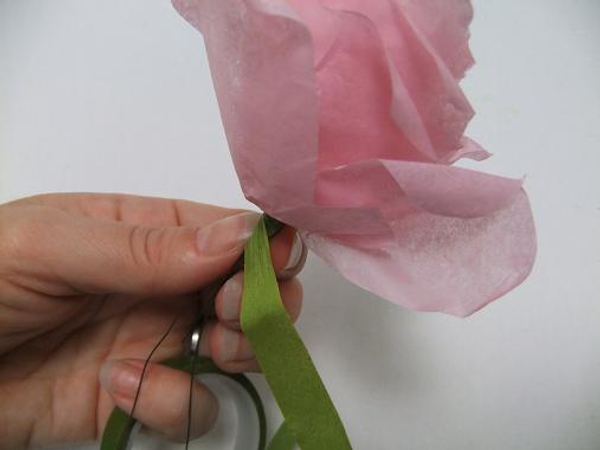
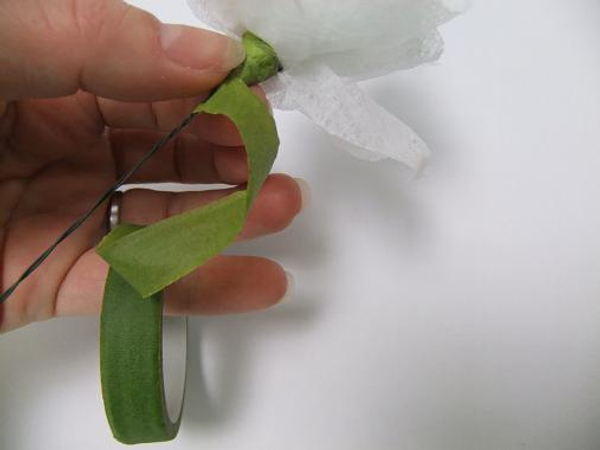
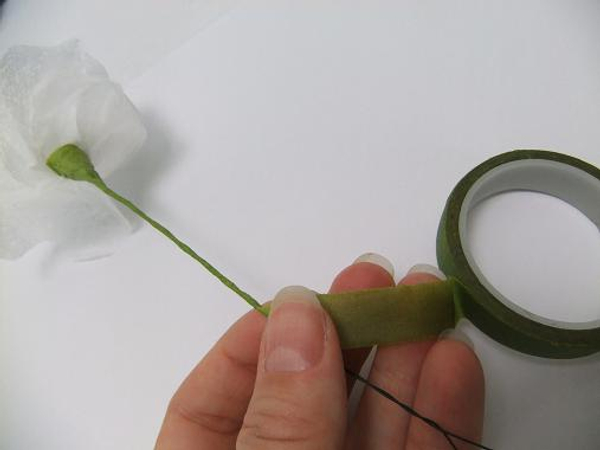
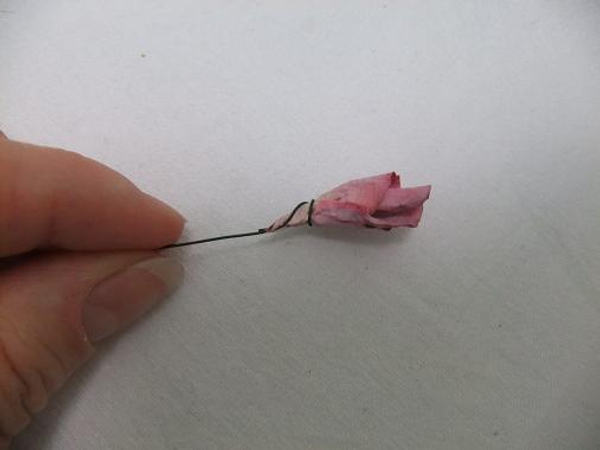
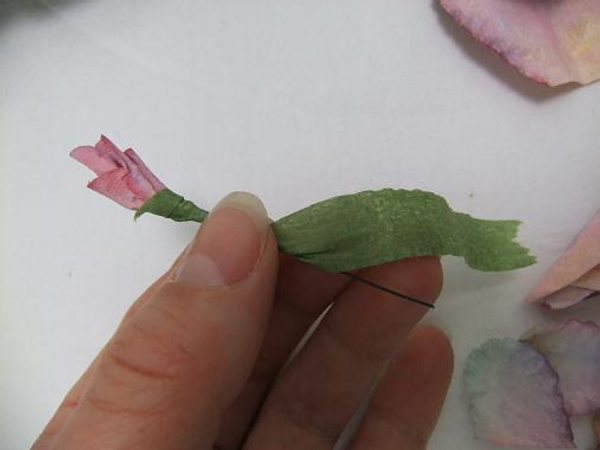
Roll the first petal tightly and add more petals twisting the flower in your hand. Secure with a 16-gauge floral wire. Cover the wire with florist tape. When you stretch the florist tape with your fingers a wax layer in the tape melts briefly and the tape will stick to itself.
Artificial flowers work best if you don’t even pretend they are real. Incorporate something unmistakably whimsical in the basis of the flower design, such as the spiral stems of the roses.
Rolled tissue paper roses
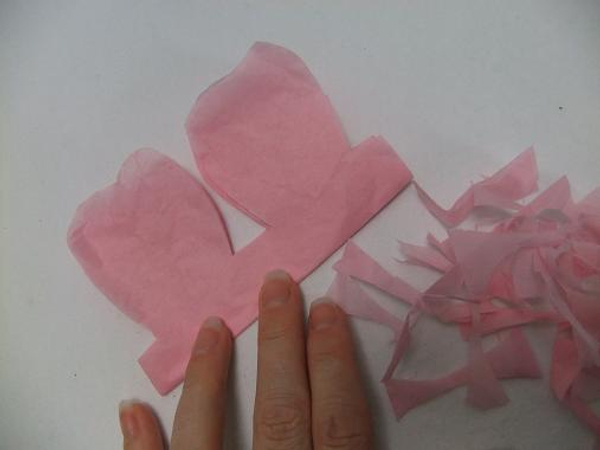
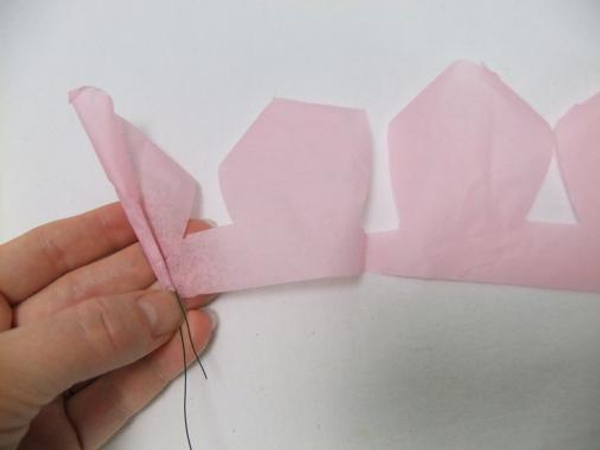
Fold and cut the tissue paper to make a petal garland.
Roll the tissue paper petals at the top.
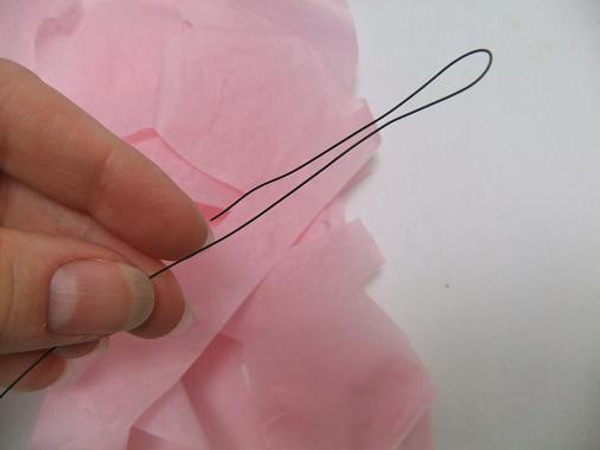
Fold a wire into a hair pin hook.
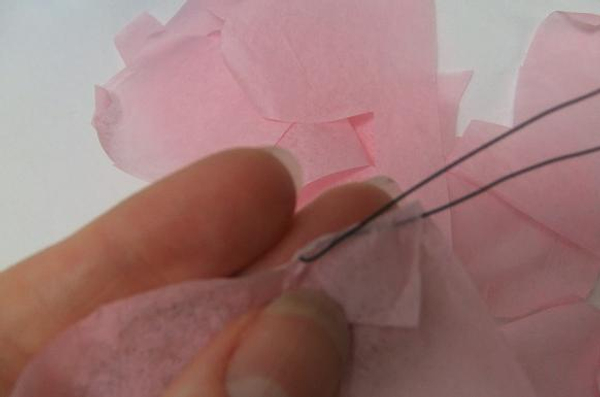
Fold the tissue paper and hook the wire through the tissue paper and start to roll the petals.
Gently roll the petal to create a bud.
Roll the entire petal garland around the wire.
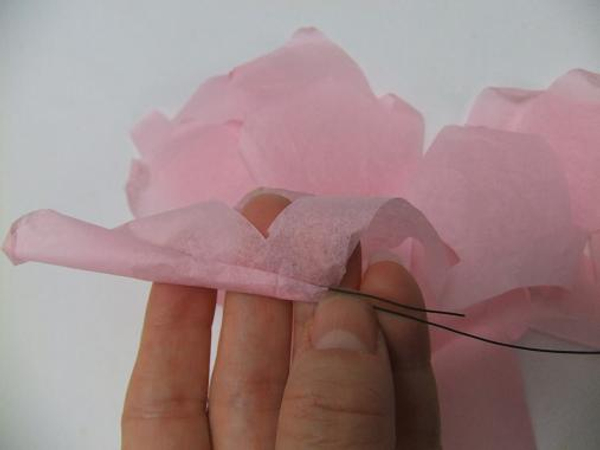
Add more tissue paper garlands for a fuller flower.
Puff out the petals and secure with the wire.
Cover the wire with florist tape.
Rolled tissue paper rose.
Fabric Softener sheet or Tumble Dryer sheet roses
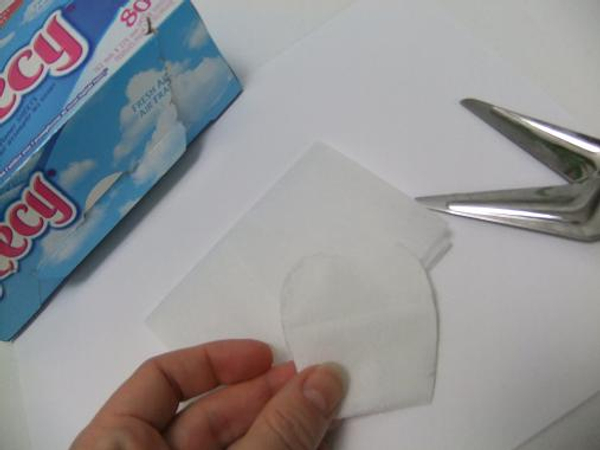
Cut a few rose petals out of the Fabric Softener sheets
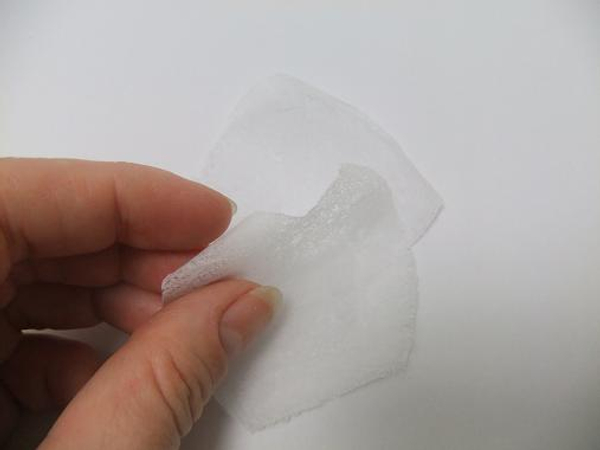
Roll the petals at the top

Roll the first two petals to shape the bud
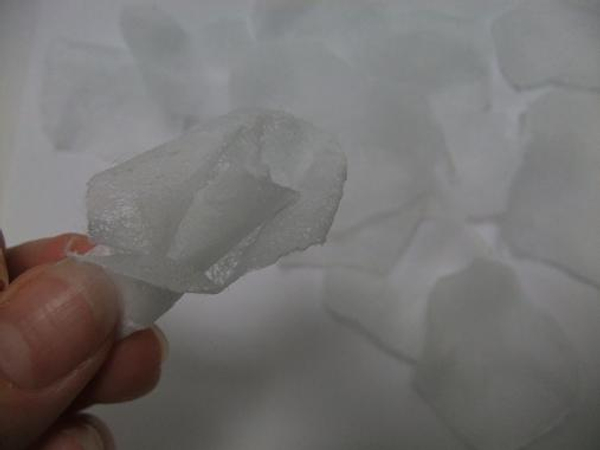
Continue to wrap petals around the bud
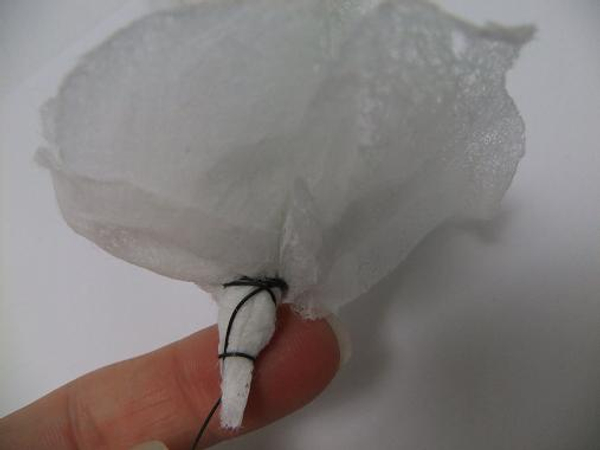
Secure the petals with wire
Cover the wire with green florist tape
Cover the entire wire to create a long stem
Shape sepals out of florist tape
Add 5 sepals to the rose calyx

Fabric Softener sheet rose
Fragrant Tumble dryer sheet rose for your linen closet or memory boxes
Kalanchoe
Make a few very small roses to cluster to make Kalanchoe.
Blossoms
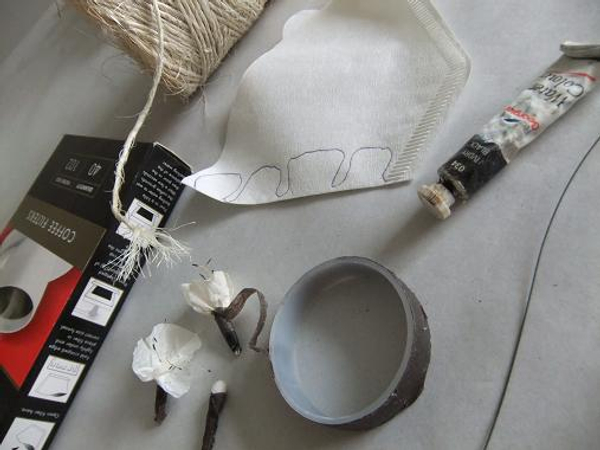
Paint the paper and cut the petals
You can also use Crepe paper for the blossoms.
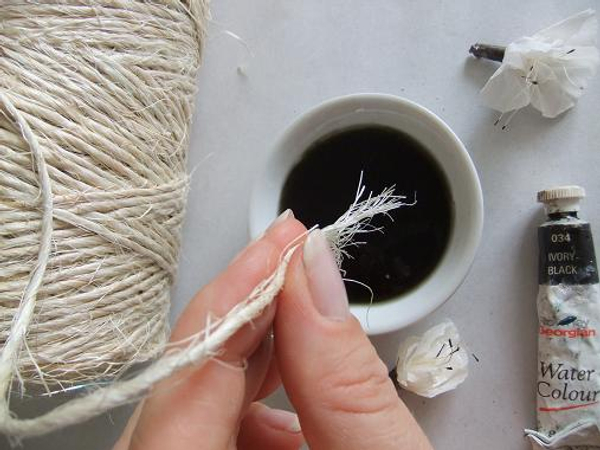
Make the stamens by dipping the frazzled end of Sisal rope in black paint
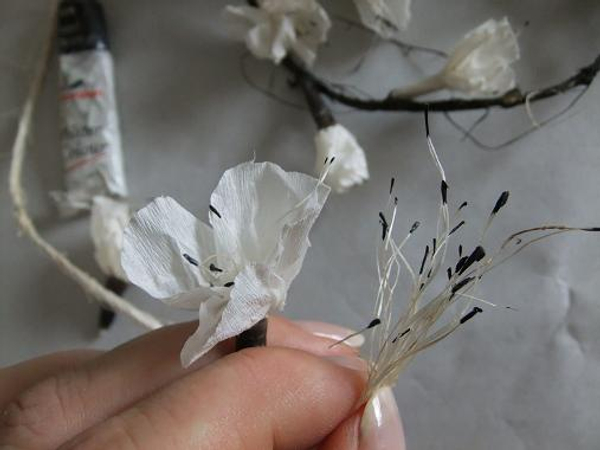
Wrap the crumpled petals around the paint stamens and secure with brown florist tape.
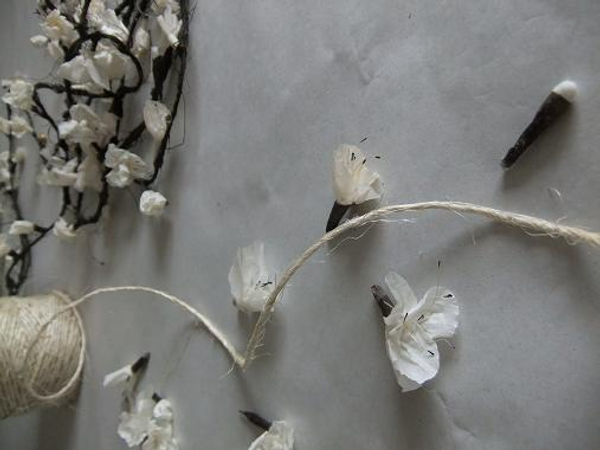
Create a garland by painting a length of Sisal rope brown. Glue the blossoms onto the rope. For small buds I used ear buds (or Q-tips) cut short and taped with florist tape. For slightly open buds add a few petals around an ear bud.
Sweet Pea
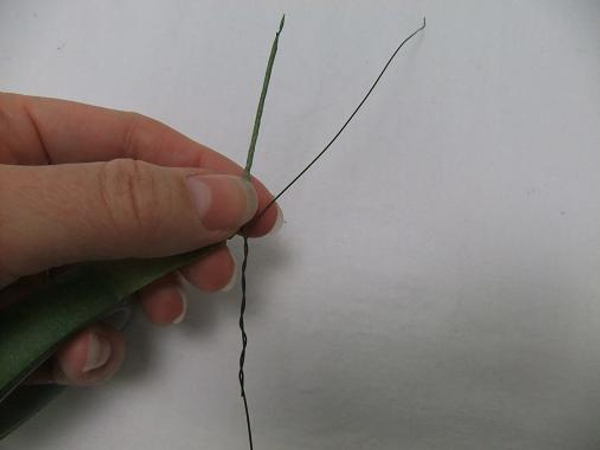
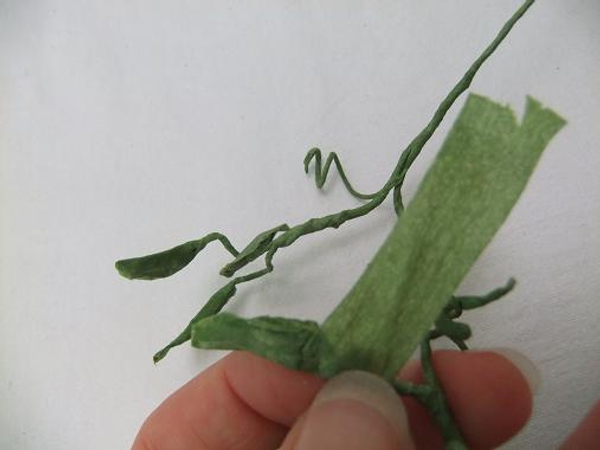
Stems and tendrils: Shape the stems from wire and cover with florist tape
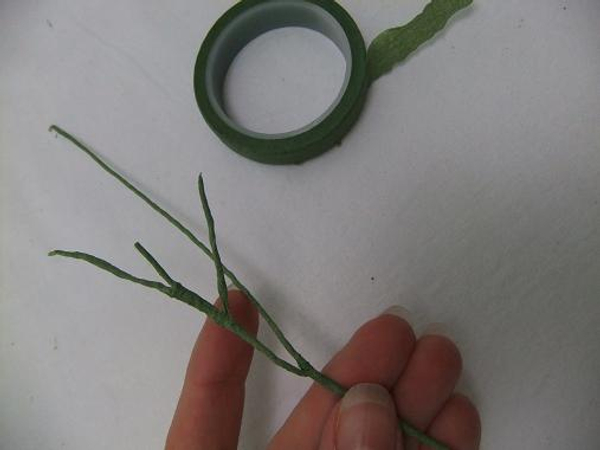
Stems and tendril wires
Make the stem wires slightly thicker than the tendril wires by wrapping a bit more tape around those wires.
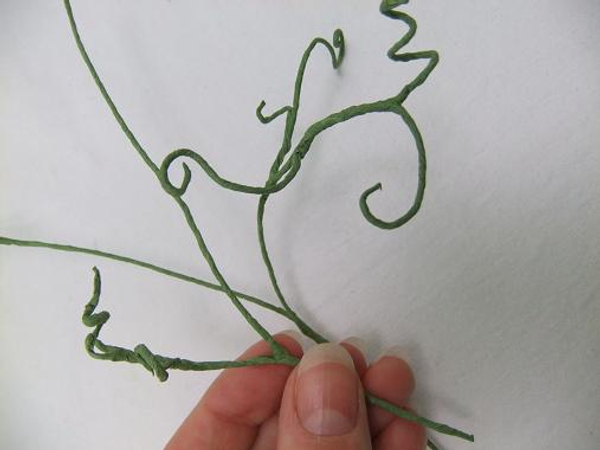
Curl the wire to give it dramatic tendrils
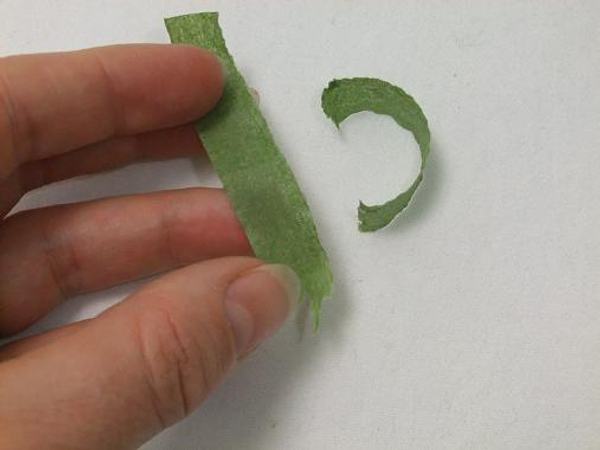
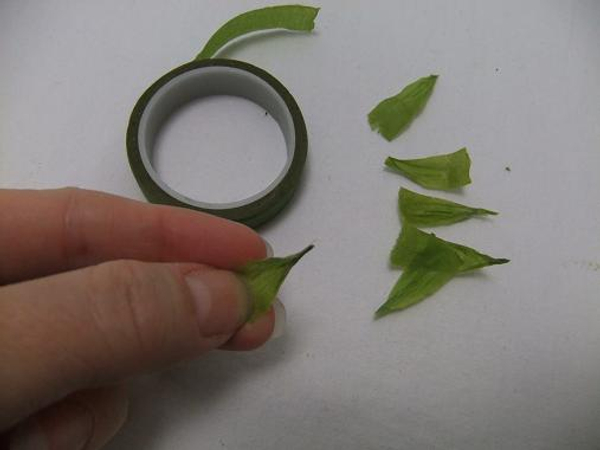
Pods and green buds: Press two short sections of florist tape together to make a wide rectangle.
Cut a leaf shape out of the florist tape rectangle
Fold the left-over pieces inside the florist tape
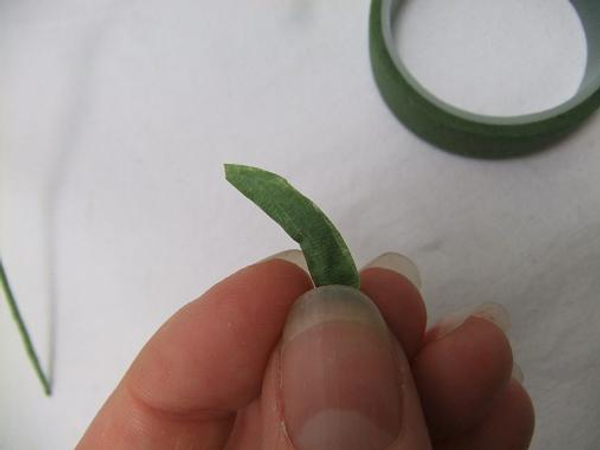
Fold the florist tape closed and shape it gently into a seed pod or bud
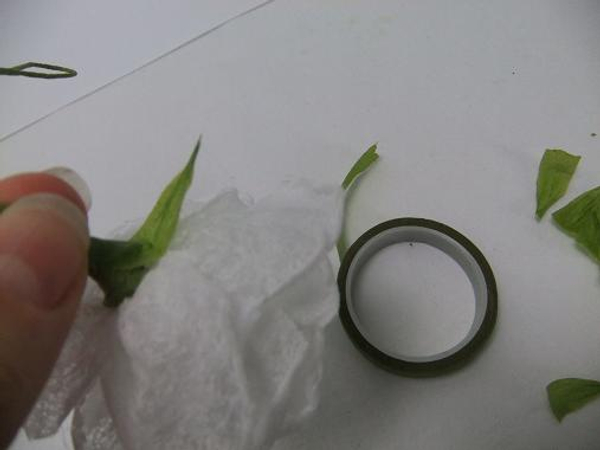
Tape the bud or pod with florist tape to the stem wire
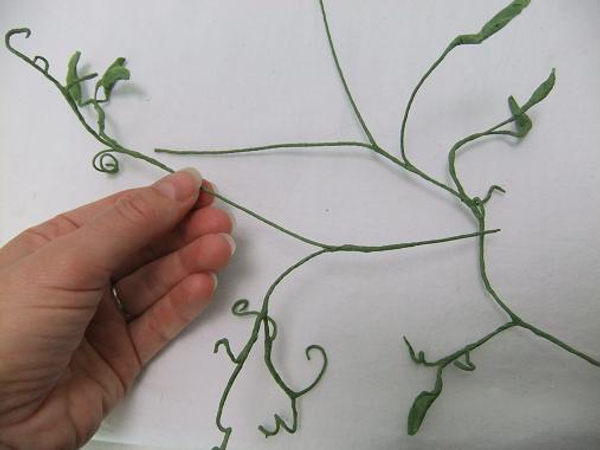
Manipulate the buds, pods, stems and and tendrils to give it curves and dimension

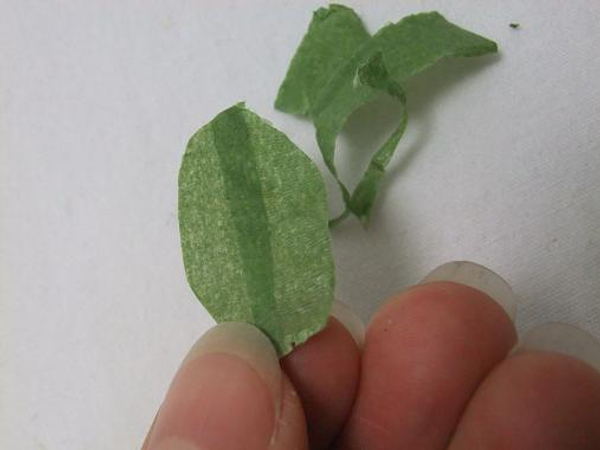
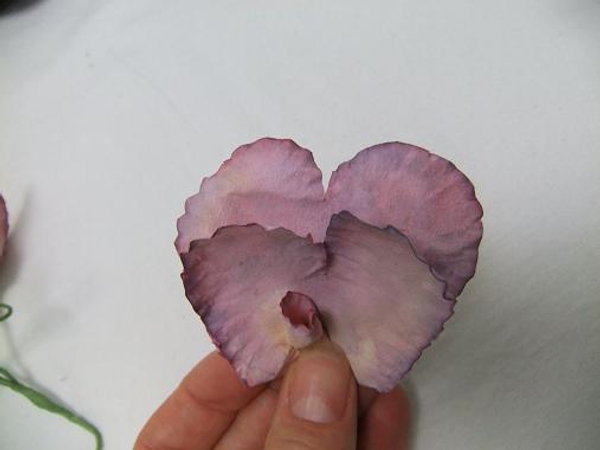
Draw the sweet pea petals on the coffee filter
Each coffee filter makes one sweet pea and one bud petal on the one side and another sweet pea and the second bud petal on the other side.
Cut the petals out. Cut one of the double petals slightly deeper in the heart shaped top petal edge.
Paint the coffee filter petals with water colour paint
Let the petals dry completely to make it easier to shape
Ruffle the coffee filter sweet pea bud petal by pinching the edges
Also ruffle the heart shaped sweet pea petals by pinching the edges
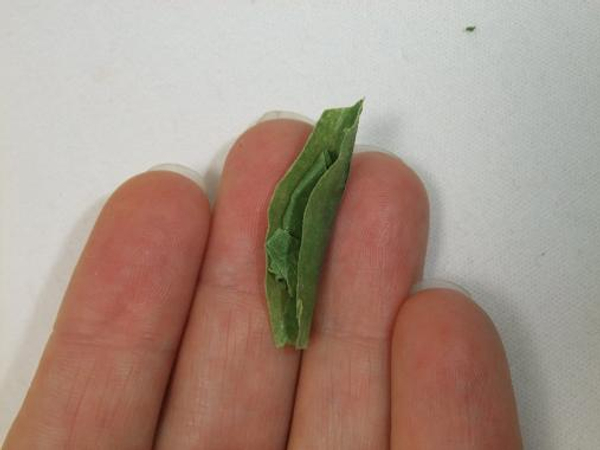
Two small petals makes a bud. Score the middle of the petals with your thumb nail to hollow it out.
Fold the petals lightly in half. Open up. Roll one half of the petals and fold the other half over the roll to create a puffed up bud
Wire the bud
Tape the bud with florist tape.
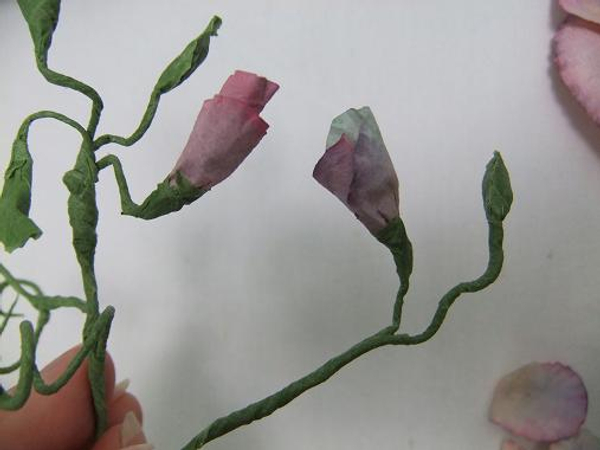
Add the buds to the stems and tape
Make a tiny bud with a small petal. Gather the three sweet pea paper petals in your hand. Place the petal with the deeper heart shape cut inside the rounder petal with the bud petal on the top.
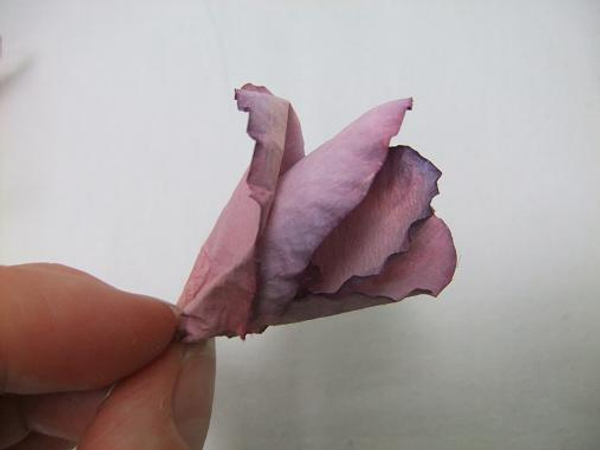
Roll the paper sweet pea petals to form the flower. Fold the back petals to the back and open the front petals slightly to show the bud inside.
Fold the petals open to shape the sweet pea
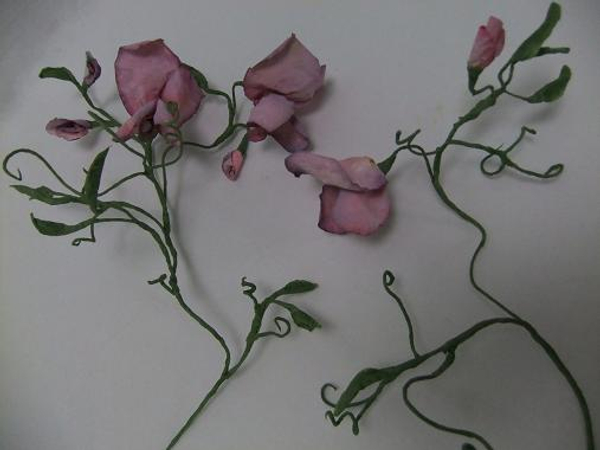
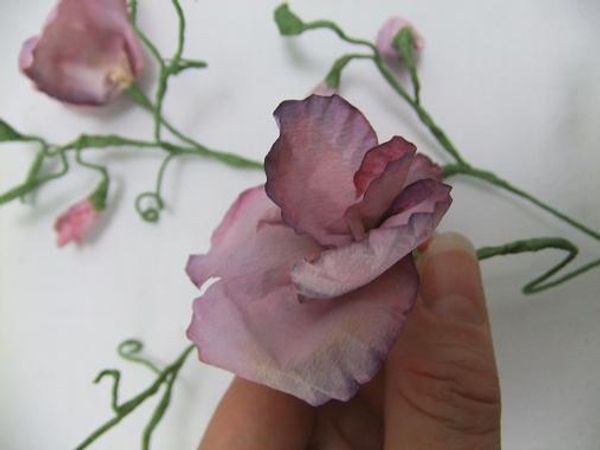
Sweet pea coffee filter flowers.
Orchids
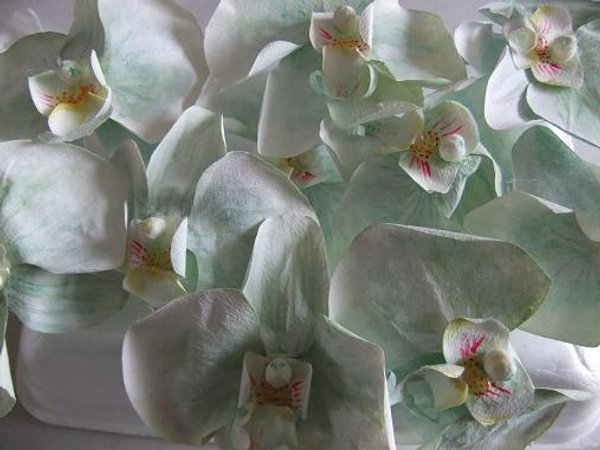
Cut, paint and curve the petals. For the inside I carved the shape out of an eraser
For a Tutorial on how to make orchids: Make a Phalaenopsis Orchid from autumn leaves.
Lilies
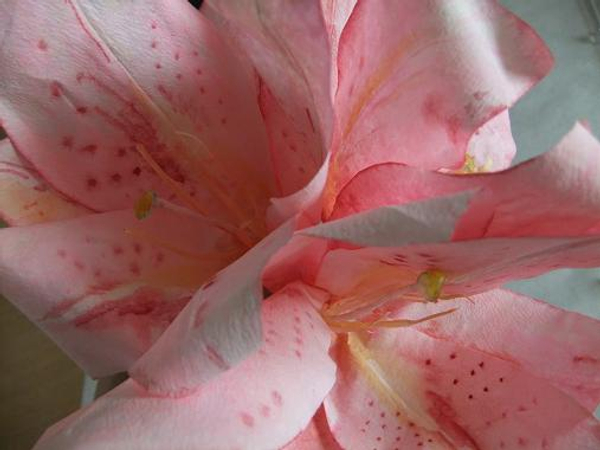
Cut the petals and paint with watercolour paint. Cut strips for the stamens. With a glue gun drip three drops of glue to make up the stigma.
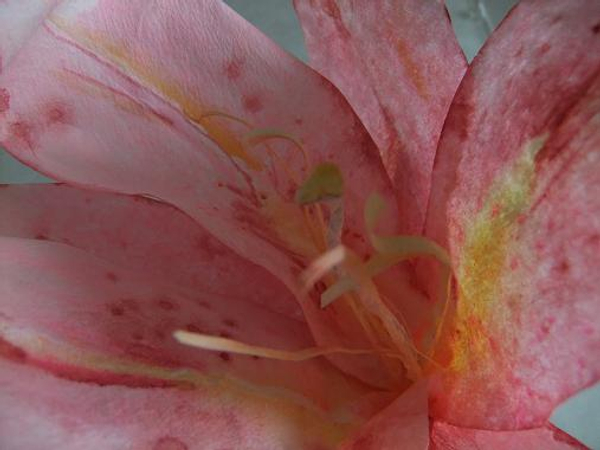
Paper Lily
Poppies
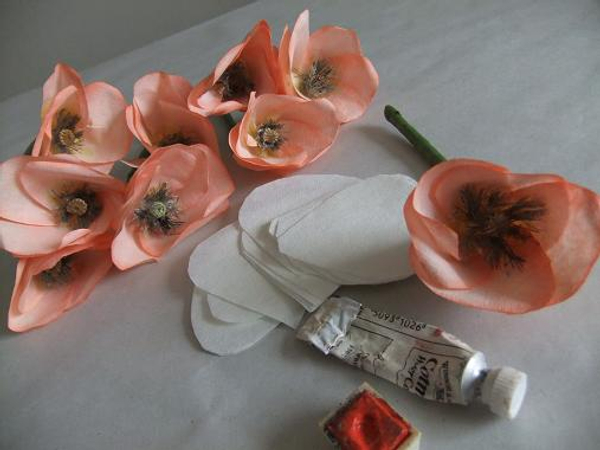
Cut and paint the petals. Make the stamens by painting longer sections of Sisal rope black. For the inside seed capsule I carved the eraser that you find on a clutch pencil and painted the fine black details onto that.
Spiral the petals around a drinking straw and cover the straw with green florist tape.
Carnation
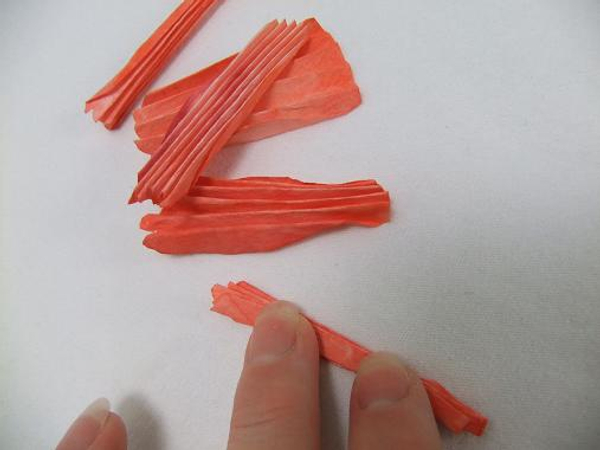
Paint the coffee filter carnation petals and fold. It is the same shape petal as used for the roses and the poppies.
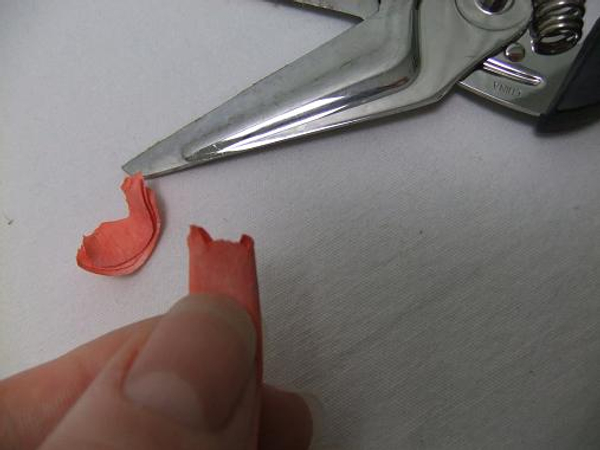
Cut a ruffled edge with scissors or craft Pattern Edged Scissors
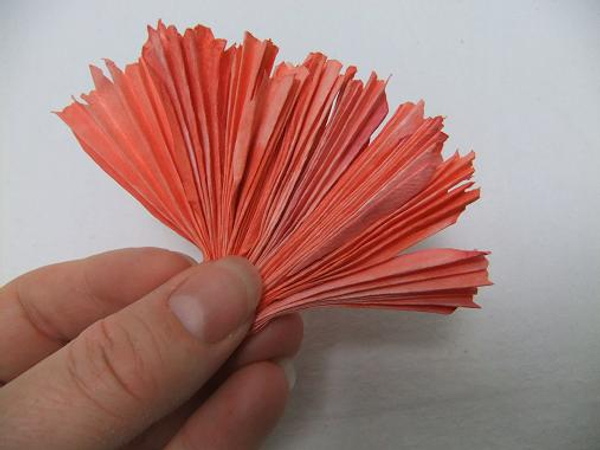
Gather the petals in a fan shape
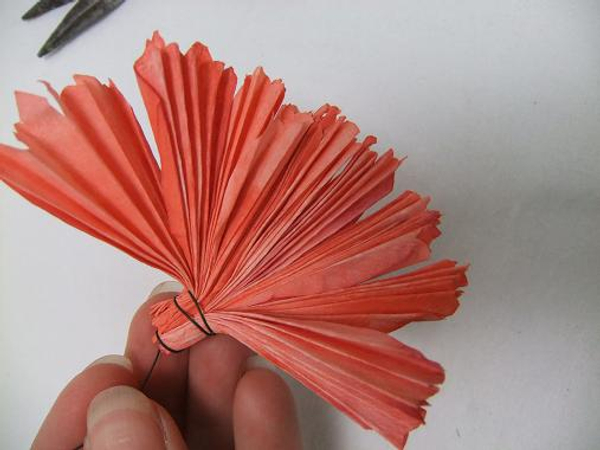
Wire the paper carnation petals tightly
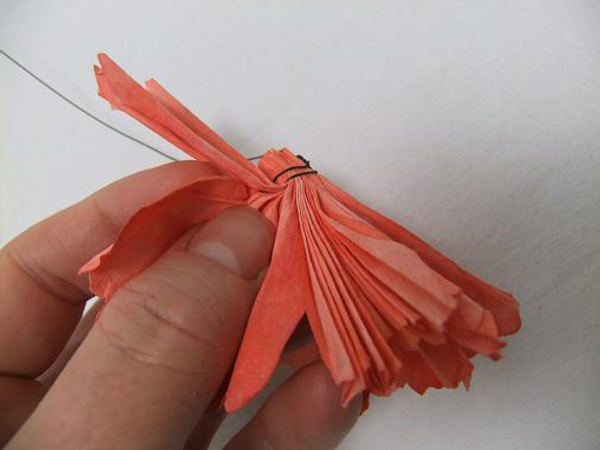
Open up the paper carnation by creating a hollow base for each petal. Work in a circle to shape the flower.

Curve the petals to create a puffed up round ball shape.
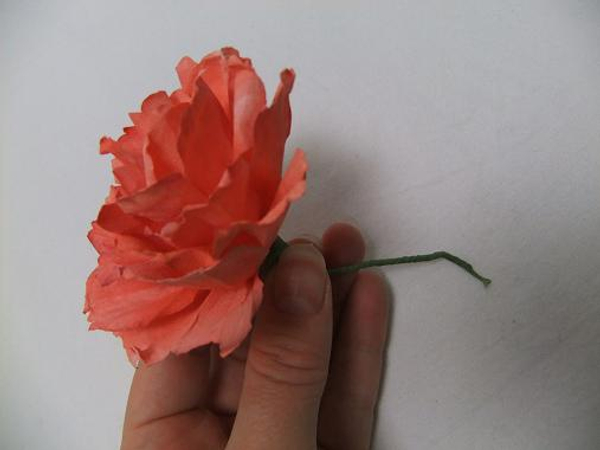
Cover the wire with green with florist tape
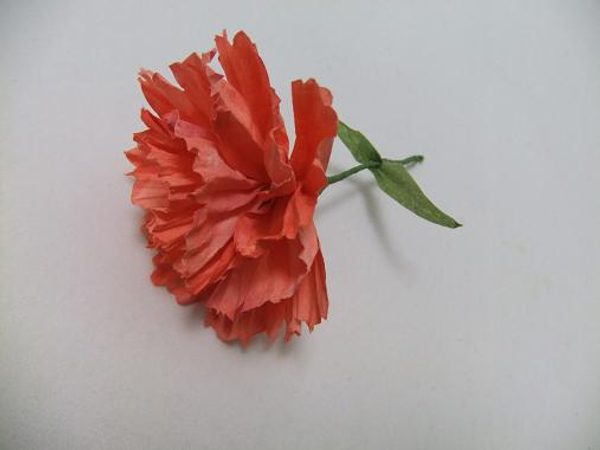
Coffee filter paper carnation
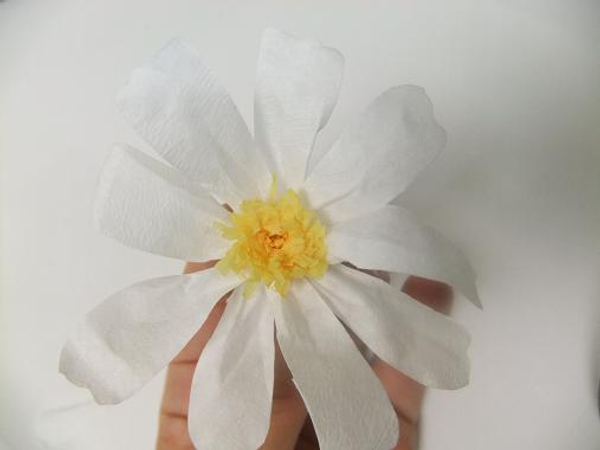
Daisies and Chrysanthemums
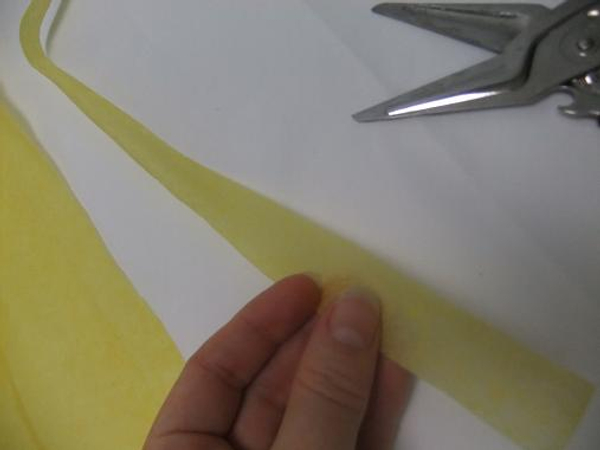
Cut a strip of yellow tissue paper.
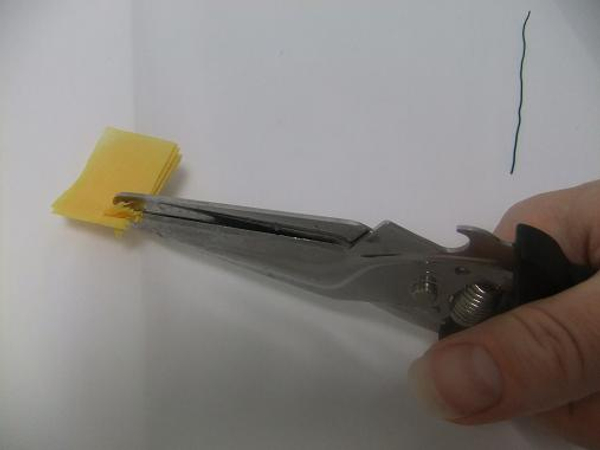
Fold the strip of tissue paper and cut into it. Make small cuts only about 1/3 into the paper strip
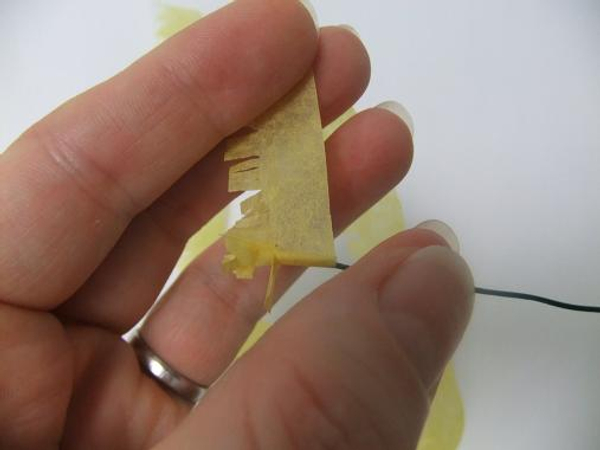
Unfold the strip and roll it around a thin wire.
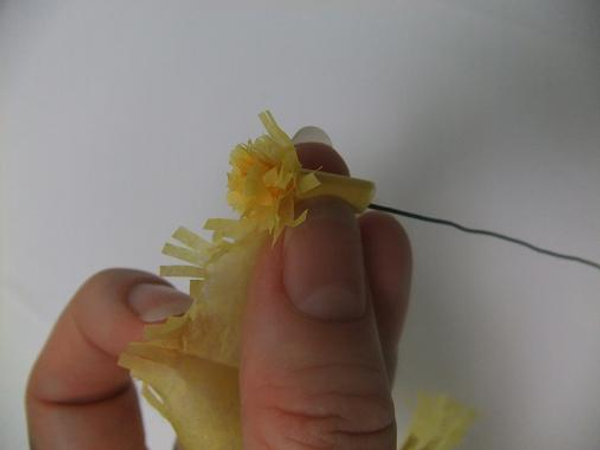
Ruffle the top edge as you roll.
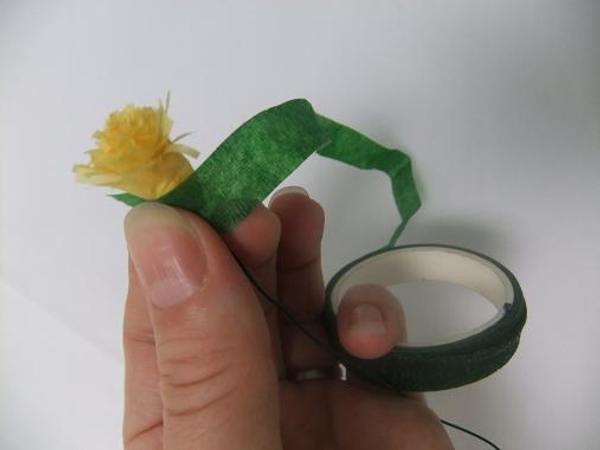
Cover the yellow yellow disc florets with florist tape
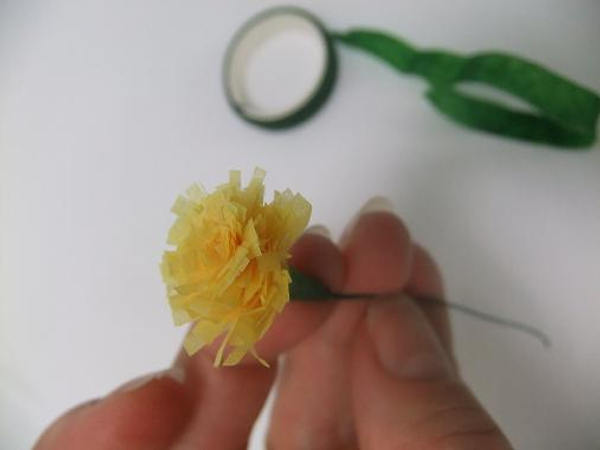
Yellow tissue paper disc florets.
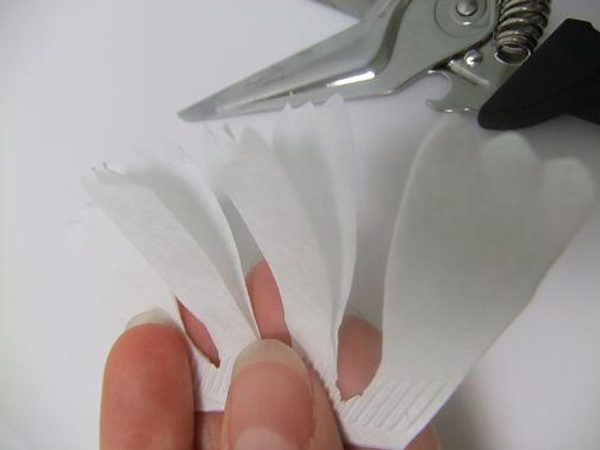
Cut a strip of petals out of tissue paper of coffee filters.
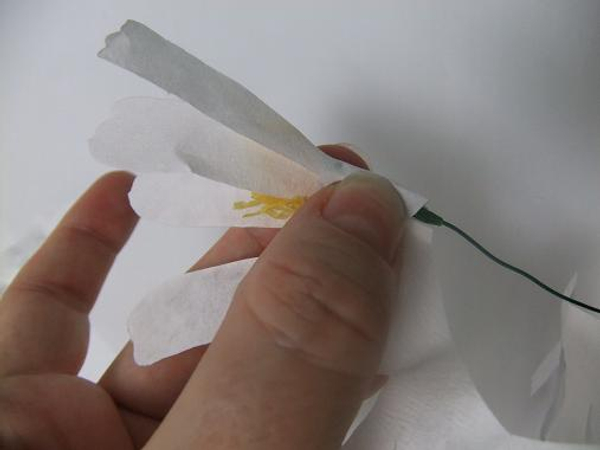
Wrap the petal strip around the disk floret.
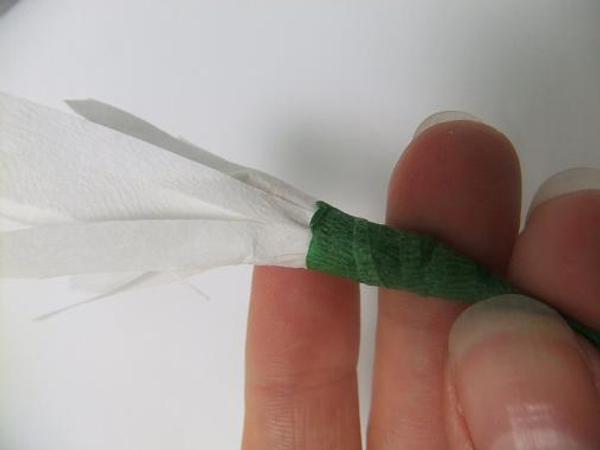
Wrap the stem with florist tape before folding the petals open.
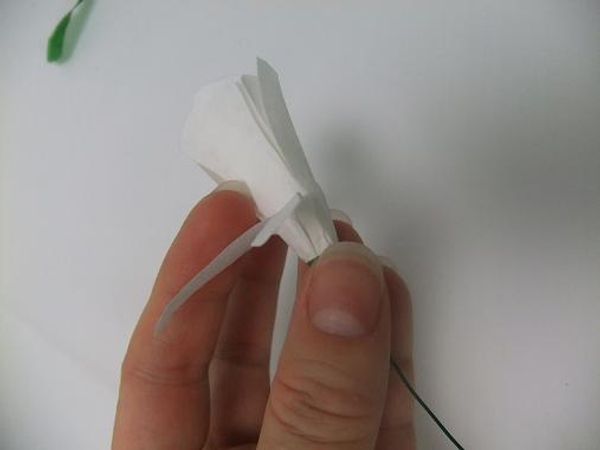
Fold the petals open.
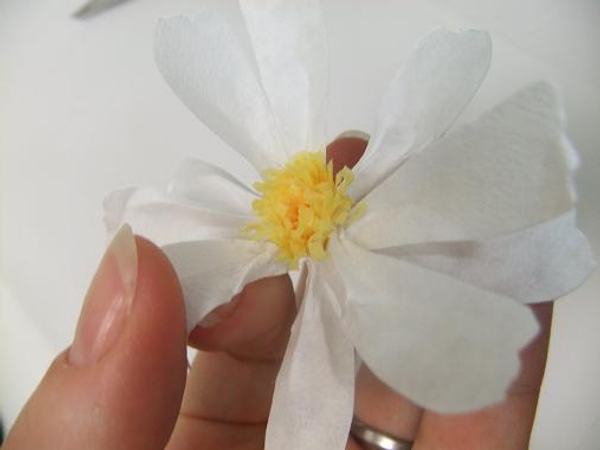
Shape the petals with your nail.
One layer of petals.
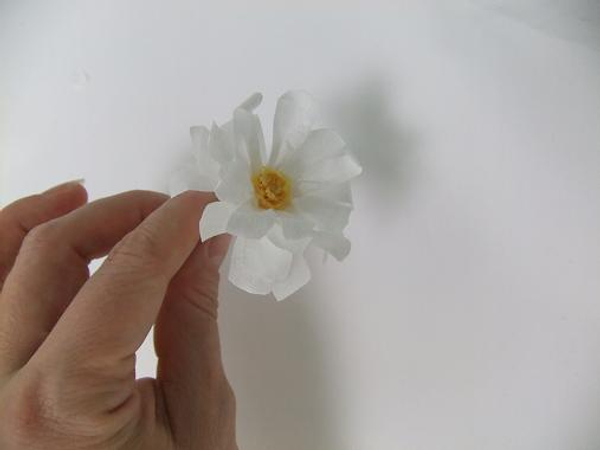
Wrap the white petals around twice for more petals.
Sign up for my weekly newsletter
Every week I add a new design with related tutorials. Be sure to subscribe to receive an email notification with design inspiration.


 to create a frilly design gap in bud vases")


